
On this page
- What a personalized photo coloring book is
- Choosing photos for your family coloring book
- Planning the pages of your DIY coloring book
- Making the coloring book pages with Outlineify
- Printing a photo coloring book at home
- Binding your coloring book without special tools
- Theme ideas for family coloring books
- Sharing a copy with family
- Family coloring book questions
Short answer: Choose a handful of clear family photos, turn each one into a color-by-number page, print the pages on the same paper size and bind them with staples, ribbon or a ring binder. Add a cover page and the colored examples, and you have a personalized coloring book that nobody else owns.
A family coloring book made from your own photos is a small project with a big result. Instead of a generic coloring book, you get one full of the people, pets, places and things your family knows: the cat on the stairs, the toy car under the sofa, the tulips from the garden. This guide walks you through every step, from picking the photos to binding a book you can make in an afternoon.
What a personalized photo coloring book is
A photo coloring book is a set of coloring pages, each made from one of your own photos, printed and held together like a book. With Outlineify, every page is a color-by-number page: black line art, numbered areas and a color key with colors taken from the photo, plus a colored-in example that shows how the page can look.
Because each page comes from a real moment, the book also works as a keepsake. Months later, the colored pages show both the photo it came from and the colors your family chose.
Choosing photos for your family coloring book
Start with a theme. A theme makes the book feel finished and helps you choose photos quickly. Some ideas:
- Our year: a photo from each season, a birthday, a first day somewhere new.
- Our home: the front door, the pet, the favorite chair, the garden.
- A holiday: the beach bag, the hotel cat, the ice cream stand, the view from the window.
- Who we love: the pets, the toys and the places grandparents know.
Then look at each photo with a coloring page in mind. The clearest pages come from photos with one main subject, good light and a simple background. A close photo of a cat on a wooden floor turns into a calmer page than a wide photo of a crowded living room.
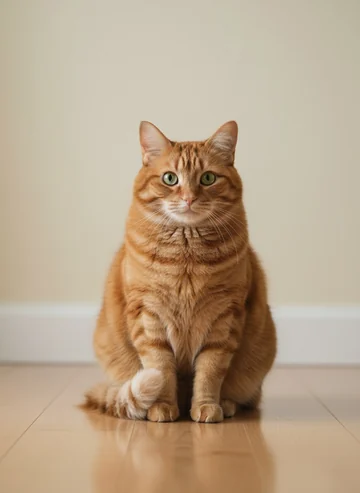 The photo
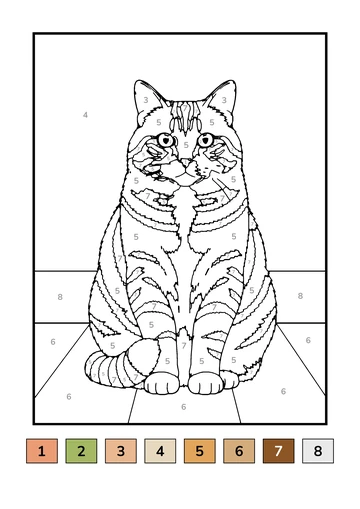 The page to print
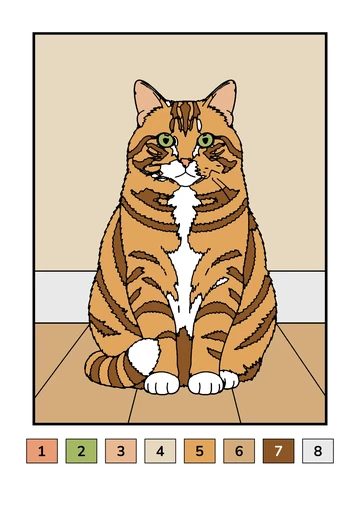 The colored example
If a photo has people in it, consider using close photos of hands, pets, toys and places instead of faces for most pages. They turn into clear shapes, and they are easier to share with family.
Planning the pages of your DIY coloring book
Before you make any pages, sketch the book on a piece of paper:
- A cover. Choose the photo you like most. You can color the cover page first and use it as the front of the book.
- An order. Put the pages in the order of the story: spring to winter, morning to evening, or room by room.
- A mix of detail levels. Outlineify makes pages at two levels. 0–2 gives big, simple shapes with fewer areas and thick lines. 2+ gives more areas and numbers, with more of the photo’s details kept in. A book with both levels lets everyone in the family find a page to color.
- The colored examples. Decide whether each example goes opposite its page or all together at the back.
Our guide to color-by-number pages for toddlers and young children helps you choose between the two levels for each page.
Making the coloring book pages with Outlineify
Each page takes about a minute to make:
- Open Outlineify on your iPhone or iPad and take or choose a photo.
- Crop it to the part you love. Cropping closer gives bigger shapes and clearer lines.
- Choose 0–2 or 2+.
- Wait while Outlineify draws the outlines, numbers every area and builds the color key. A notification tells you when the page is ready, so you can make the next one in the meantime.
Every finished page waits in My Drawings, so you can collect the whole book over a few days and print it when it is complete.
Printing a photo coloring book at home
Print every page on the same paper size so the book lines up. Outlineify pages fit A4 and US Letter; choose your paper size in the app under Account, Paper size, before you print the first page.
- Print single-sided. Coloring on the back of a page is hard when the front is already colored.
- Print the colored examples with Print, then “Page + colored example”, which adds the example on a second sheet.
- Use thicker paper for the cover if your printer supports it. Check your printer’s manual for the paper weights it can feed.
- Save PDFs if you want to print the book again later, or at a print shop or a library.
For printer settings, scaling and black-and-white printing, see our guide on how to print coloring pages at home.
 The photo
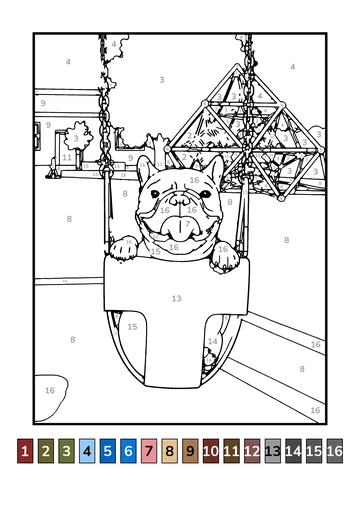 The page to print
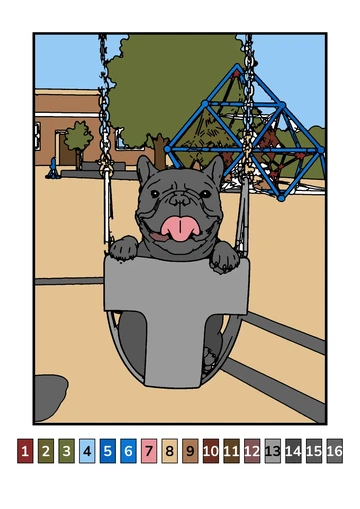 The colored example
Binding your coloring book without special tools
You do not need a binding machine. Choose the method that suits how you will use the book:
- Staples. Three staples along the left edge are quick and hold well for a thin book. Fold a strip of tape over the staples to cover the sharp ends.
- Hole punch and ribbon. Punch two or three holes and tie them with ribbon, yarn or a shoelace. The pages turn easily, and you can add new pages later.
- Ring binder. Keep pages in a binder so each one can come out for coloring and go back in when it is finished. Sheet protectors are good for the colored examples, not for the pages you still want to color.
- Paper fasteners or a clip. Brass paper fasteners or a large clip keep a book together for a trip or a weekend.
Write the date and the place of each photo on the back of its page. In a few years, those small notes turn the book into a record of the moments behind it.
Theme ideas for family coloring books
If you are looking for a starting point, these themes work well with photos most families already have:
- The pet book: the dog in every season, the cat’s favorite spots. Our post on turning your pet’s photo into a coloring page has tips for photographing pets.
- The garden book: flowers, vegetables and the view from the window. See how to turn garden flower photos into spring coloring pages.
- The toy box book: a page for every favorite toy before it is outgrown.
- The grandparents’ house: the front door, the kitchen table, the tree in the yard.
Sharing a copy with family
A family coloring book makes a thoughtful present for grandparents, aunts and uncles. Share the PDFs from Outlineify and they can print their own copy, or print a second set yourself and bind it the same way. If you live far apart, everyone can color the same page in their own home and compare the results on the next call. Our post on coloring together as a family routine has more ideas for that.
Pages made with Outlineify are for personal, non-commercial use, such as printing and coloring at home and sharing with family. The Terms of Use explain this in full.
Family coloring book questions
What photos work best for a personalized coloring book?
Photos with one clear subject, good light and a simple background give the cleanest pages. Mix close photos of people, pets, toys and places so every page feels different, and crop each photo to the part you love before the page is made.
How do I bind a homemade coloring book without special tools?
Staple the pages along the left edge, punch two or three holes and tie them with ribbon or yarn, or keep the pages in a ring binder. Leave the pages loose until the book is finished so you can change the order.
Should the colored examples go into the book too?
You can print each colored example on its own sheet and place it opposite its page, or collect all examples at the back of the book. Opposite pages are easiest to follow while coloring.
Can grandparents print the same coloring book?
Yes. Save each page as a PDF in Outlineify and share the files. Grandparents can print them on A4 or US Letter at home and color the same book in their own house.
Can I sell a coloring book made from Outlineify pages?
No. Pages made with Outlineify are for your personal, non-commercial use, such as printing and coloring at home and sharing with family. The Terms of Use explain this in full.